
Knowing how to perform a quick rig check before every sail is one of the most worthwhile habits you can develop.
A loose-fitting caught at the dock takes minutes to fix. The same problem found offshore can put your crew at risk.
This guide walks you through the seven steps involved in rig checking. Work through it before you cast off.
What Happens When You Skip the Pre-Sail Rig Check?
A pre-sail inspection isn't reserved for beginners. Seasoned sailors treat it as a fixed part of leaving the dock.
Rigging takes a continuous load from wind and waves. Even well-kept gear wears down over time, and a rig check helps you catch issues before they escalate.
For a full inspection, set aside a couple of hours. A focused walkthrough before a day sail takes closer to 20 minutes.
At Sailing Virgins, pre-sail checks are woven into every ASA-certified course from the first day on the water.
Step-by-Step Pre-Sail Rig Inspection Checklist
Here are the seven steps to work through before every sail. Run them in order, from the mast base up, and you'll catch problems at the dock right away.
Step #1: Inspect the Mast Base and Deck Fittings
The mast step and foot handle are subject to constant compression forces, making them prone to cracking and corrosion. Salt water tends to pool here, so this is where hidden damage often hides.
Check rivets and the mast section for visible cracks or rust. On keel-stepped masts, get into the bilge area where moisture lingers out of sight.
Look at your deck seals and replace any that appear perished. Water dribbling down the inside of the mast is a clear sign of a seal that's no longer doing its job.
Step #2: Check the Boom, Gooseneck, and Vang Fittings
The gooseneck connects the boom to the mast and handles the load from several directions at once. It's one of the most common failure points on any yacht.
Pull the pivot bolt and check inside the guide holes for corrosion. It won't be visible from the outside, so this step gets skipped far too often.
Look for hairline cracks around the gooseneck on both the mast and the fitting itself. Give the vang fittings the same attention. They carry comparable loads when you're under sail.
Step #3: Inspect the Standing Rigging
Standing rigging holds the mast in place. It covers the shrouds running to port and starboard, the forestay at the bow, and the backstay at the stern.
These wires carry heavy loads, especially sailing upwind in a stiff breeze.
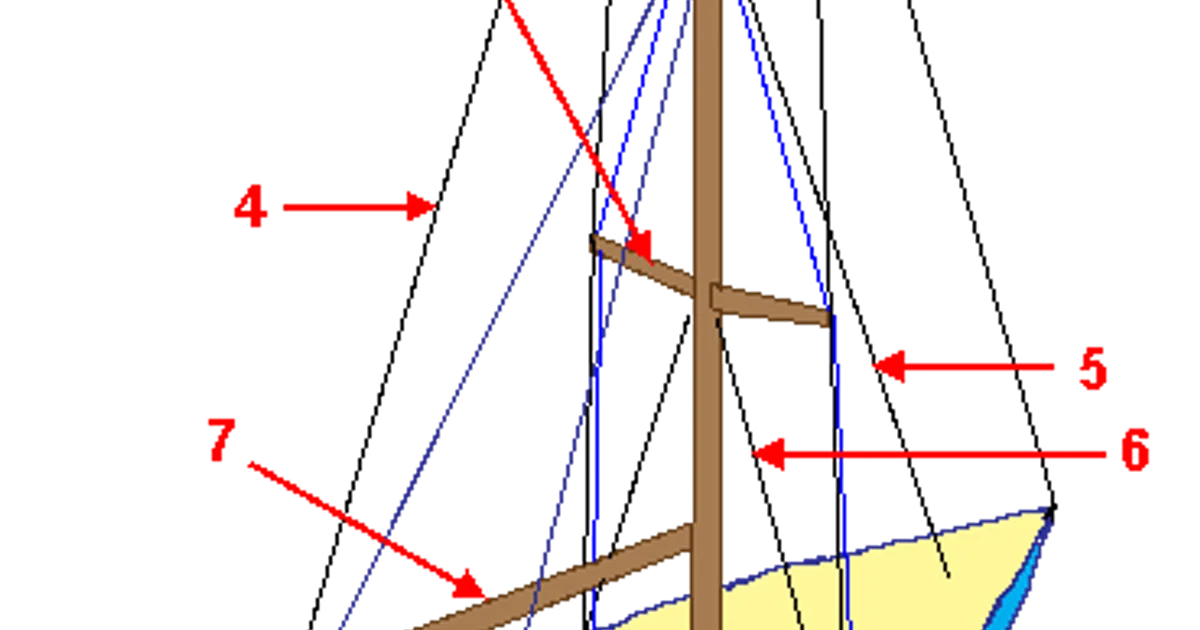
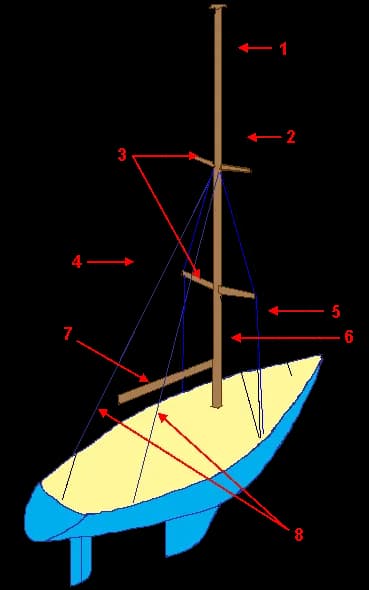
The standing rigging of a sloop: the wires and fittings that hold the mast up, and the parts to work through on an inspection. Image: Pline, via Wikimedia Commons (CC BY-SA 3.0).
Shrouds and Wire Terminals
Look along each wire for broken strands, rust, or wear where the wire enters the terminal fitting. That's where failures most often originate.
Ease the tension slightly and wiggle the wire to expose hidden damage at the terminal entry. Rust streaks running down from a terminal point to internal corrosion that you can't see from the surface.
Log wire diameters and lengths with Vernier calipers. You'll want those specs if a wire needs replacing mid-season.
Turnbuckles and Toggles
Turnbuckles set shroud tension. Tape and plastic covers trap moisture and hide cracks, so remove them and look underneath.
Clean and lubricate the screw threads and locking nuts. Replace worn toggles, clevis pins, and split rings before they give out.
When fully tensioned, the turnbuckle should capture roughly one-third of the screw length.
Chain Plates
Chain plates fasten the shrouds to the hull. Cracking or corrosion here is a serious issue that needs attention before you leave the dock.
Press down near each chain plate and feel for any flex in the deck. Tap the hull around the fitting too. A hollow sound can indicate waterlogged laminate from dried-out sealant.
Go below to inspect the securing bolts when you can access them, and draw the bolts periodically to check for internal cracking.
Step #4: Check the Running Rigging
Halyards hoist the sails. Sheets trim the headsail and control the boom. Control lines handle the vang, traveler, and reefing gear. All of them pick up chafe, UV damage, and wear with regular use.
Run each line through your hands from end to end. Feel for stiff sections, fraying, or thinning. Pay particular attention to where lines pass through blocks and clutches. That's where chafe concentrates.
Check halyard sheaves at the masthead for flat spots or seized bearings, and verify all shackles are seized, and swivels rotate freely.
Step #5: Inspect Your Sails
Sails absorb UV, salt, and mechanical load on every outing. A quick check before hoisting can prevent a blown sail at the worst possible moment.
Lay each sail out flat and look for tears, mold spots, and broken stitching. Check batten pockets and reefing points closely. They take concentrated load when the sail fills and are easy to overlook.
Inspect UV cover strips on furled headsails for deterioration, and check luff and foot tapes for chafe where they contact the furler or boom.
Step #6: Run Through Your Safety Gear
A safety gear check takes under 10 minutes. Do it before every sail, not just offshore passages.
Personal flotation devices (PFDs): One per crew member, correctly fitted and in working order
Fire extinguishers: Fully charged and within easy reach
First aid kit: Fully stocked with nothing expired
Signaling devices: Flares in date, emergency position-indicating radio beacon (EPIRB) or personal locator beacon (PLB) registered and active
Anchor and line: Appropriate for the depths you're heading into
Step #7: Check the Engine, Fuel, and Electrical Systems
Most coastal passages involve motoring in and out of a harbor. A reliable engine is part of your safety plan.
Engine and Fuel
Check oil and coolant levels before departure
Inspect belts, hoses, and connections for wear or leaks
Start the engine and let it idle. Listen for anything that sounds off.
Check fuel lines for leaks and top off the tank for the trip ahead
Electrical Systems
Test navigation lights, anchor lights, and cabin lighting
Check battery charge and tighten any loose connections
Verify that the very high frequency (VHF) antenna connector is tight at the base
Carry This Routine Aboard Every Yacht You Ever Step On
Run through the full sequence before you cast off. Mast base, boom hardware, standing rigging, running rigging, sails, safety gear, engine, and electrics.
Performing a quick rig check before every sail means you don’t have to deal with problems offshore.
At Sailing Virgins, students practice this routine aboard 40-foot-plus yachts from day one. It's part of every ASA 101, 103, and 104 course, alongside hands-on sailing in some of the world's most spectacular destinations.
Every course covers ASA certification, a liveaboard experience, all meals, and a crew of no more than eight sailors.
Find your next course at Sailing Virgins and get the certification to back it up.