Posted on November 18, 2025 by Jarek Apanasewicz
Splicing the Perfect Eye: Step-by-Step Rope Splicing for Sailors
Rope splicing creates a strong loop without weakening the line. Knots often reduce a rope’s strength. A splice keeps it intact. That matters when mooring, anchoring, or setting up rigging.
In this guide, you’ll learn how to make an eye splice from start to finish. The process is simple and doesn’t require much equipment.
By the end, you’ll know how to form a secure loop and understand why many sailors choose this method for everyday line work.
What Is Rope Splicing?
Rope splicing is the process of weaving rope strands back into the line to form a permanent connection.
Unlike a knot, a splice keeps most of the rope’s original strength. It’s used to create loops, join two ropes, or finish an end without loose fibres.
Sailors often splice rope to prepare mooring lines, halyards, or other load-bearing setups. The method works best with braided ropes like 12-strand or double-braided construction.
It’s a clean, dependable way to make strong rope terminations that last under pressure.
Tools and Materials You’ll Need for Rope Splicing
Before you start, gather your tools. These make the splicing process easier and help you get a cleaner result.
- Rope: Use braided rope such as 12-strand or double-braided. Dyneema works well for halyards and mooring lines.
- Fids: Use a fid or set of fids to open the rope and guide strands through. Selma fids are a popular option.
- Tape Measure: Measure four to six times the rope's diameter to form the loop.
- Tape: Wrap tape around the rope to hold the strands in place while you work.
- Scissors or Knife: Use a sharp pair of scissors or a clean knife to cut the rope ends.
- Whipping Twine or Waxed Thread: Use this to finish the splice and keep the fibres from loosening over time.
Once you’ve got everything ready, you can move on to the splice.
How to Create a Secure Eye Splice
Now that you have your tools ready, it’s time to splice rope. These steps apply to most 12-strand and double-braided constructions.
Take your time with each step. Neat work leads to durable splices.
1. Measure and Mark the Rope for the Eye Loop
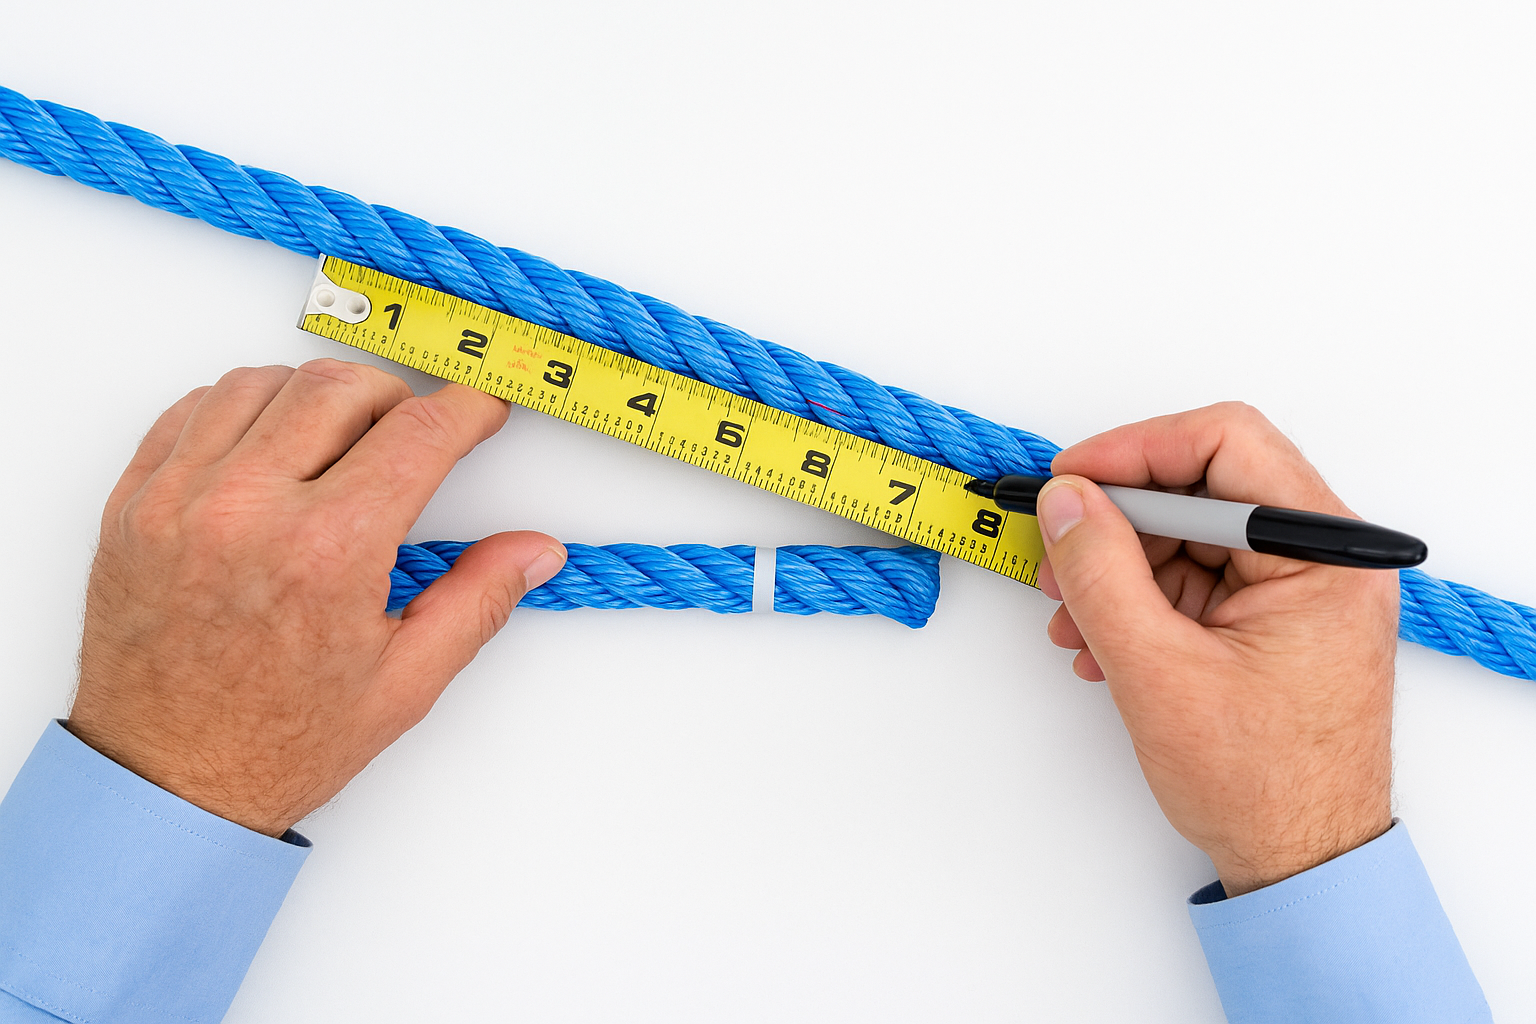
Use a tape measure to mark out the size of the loop you want to create. Multiply the rope's diameter by four to six. This gives you enough length for a strong eye splice.
Make a second mark where the loop returns to meet the standing part of the rope. This is where the strands will begin tucking.
Wrap tape around the rope at each mark. This keeps the braid from unravelling while you work.
2. Unlay the Rope Strands
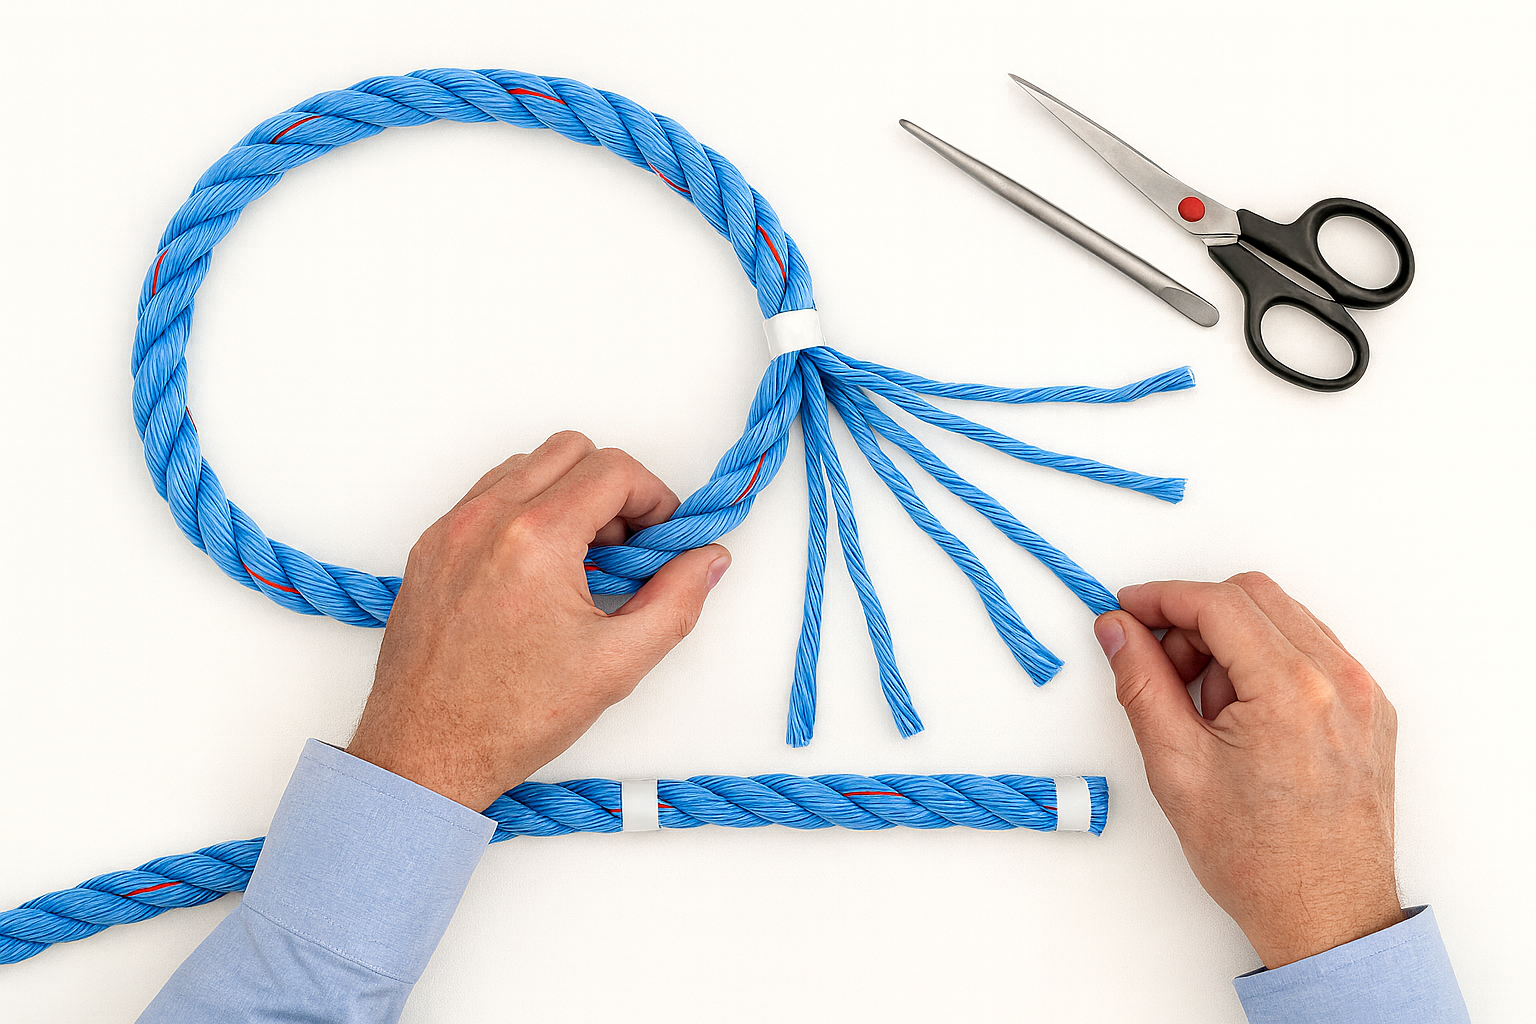
At your second mark, start opening up the rope.
Separate the strands cleanly. If you’re using a 12-strand or double-braided rope, look for twist direction. Half will twist one way (S-strands) and the other half will twist the opposite way (Z-strands).
Set them aside in two groups. You’ll need this later when you begin the tucks.
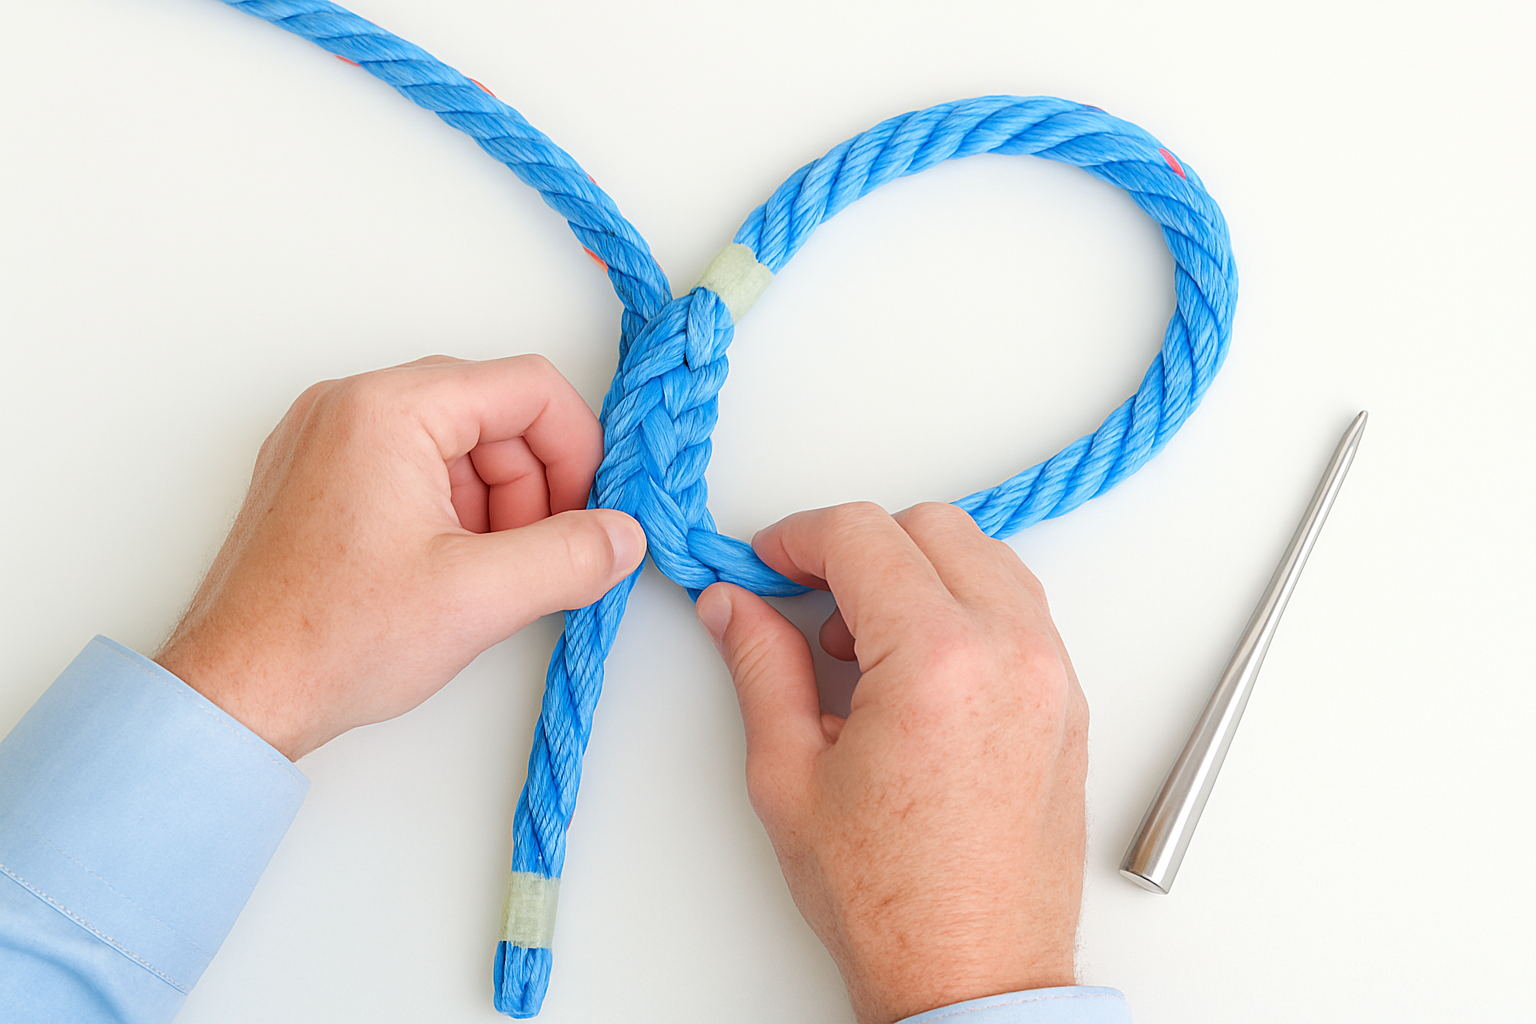
3. Form the Eye Loop
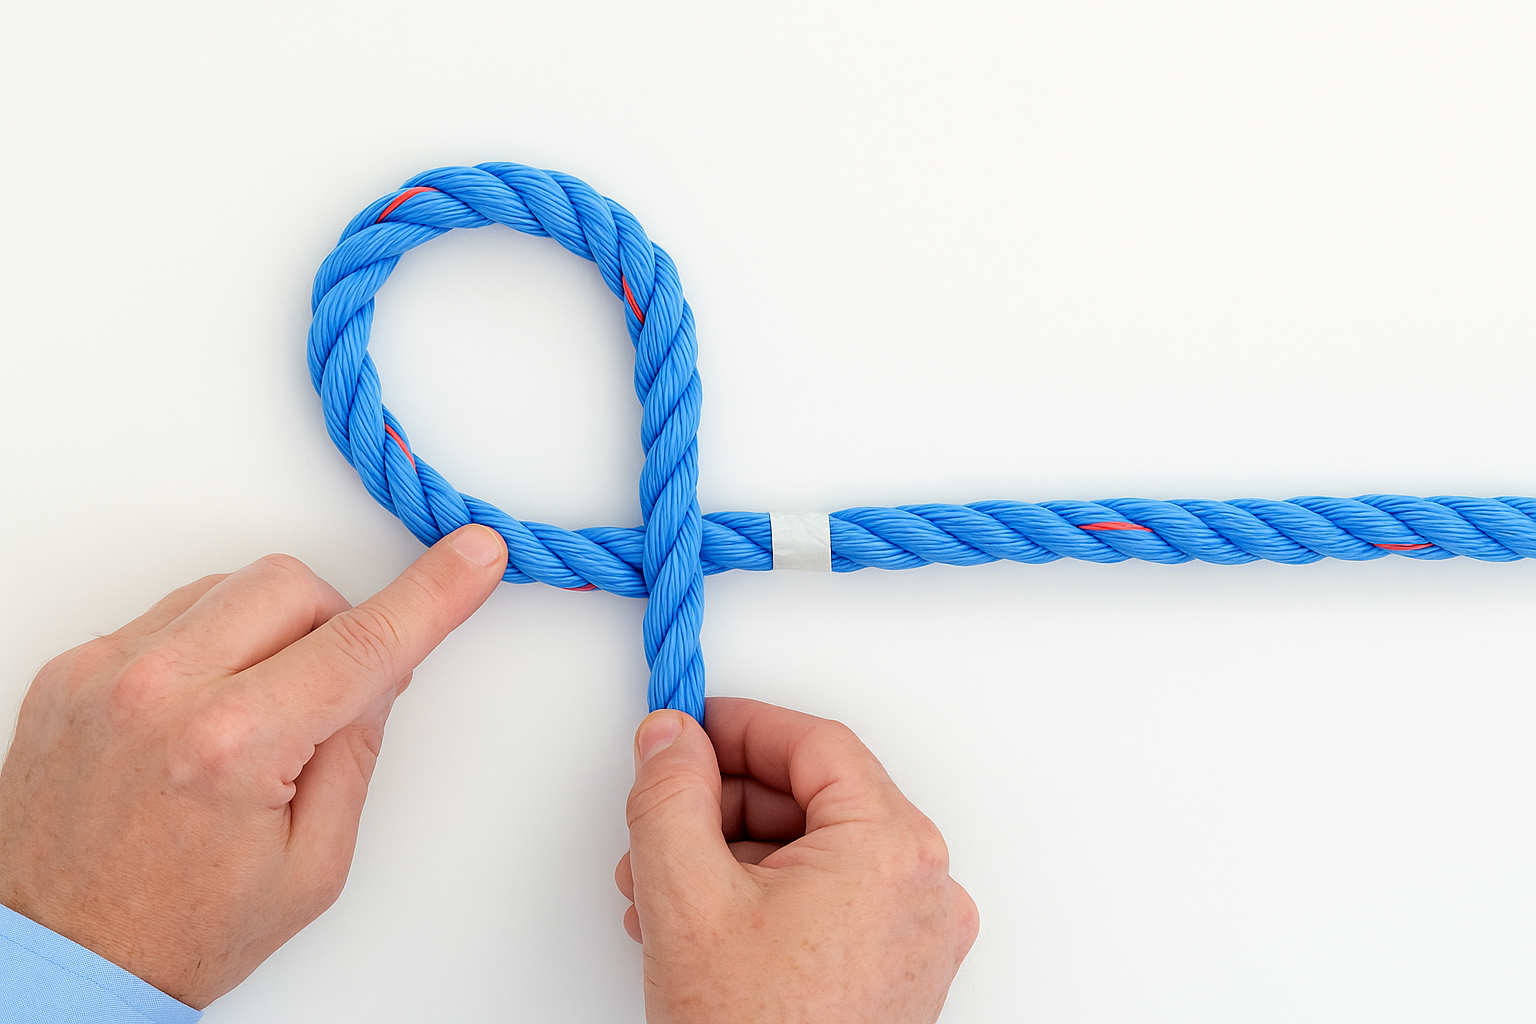
Bend the rope back on itself to create the loop. Match it to your first mark.
Make sure the loop is the right size before you begin splicing. Adjust immediately if needed. Once you start the tucks, changes will be harder.
4. Tuck the Strands into the Rope
Take one S-strand and tuck it into the section where two Z-strands meet. Then do the same with a Z-strand, placing it beside two S-strands.
Repeat this until all strands are re-woven into the rope.
Work slowly. Keep the braid pattern even and tight. Use a fid to guide the strands if needed.
5. Tighten the Tucks Evenly
After all strands are in place, pull each one gently to tighten.
Start near the eye and move outward. Don’t rush or force the rope. It should stay round and firm, without bulges or flat spots.
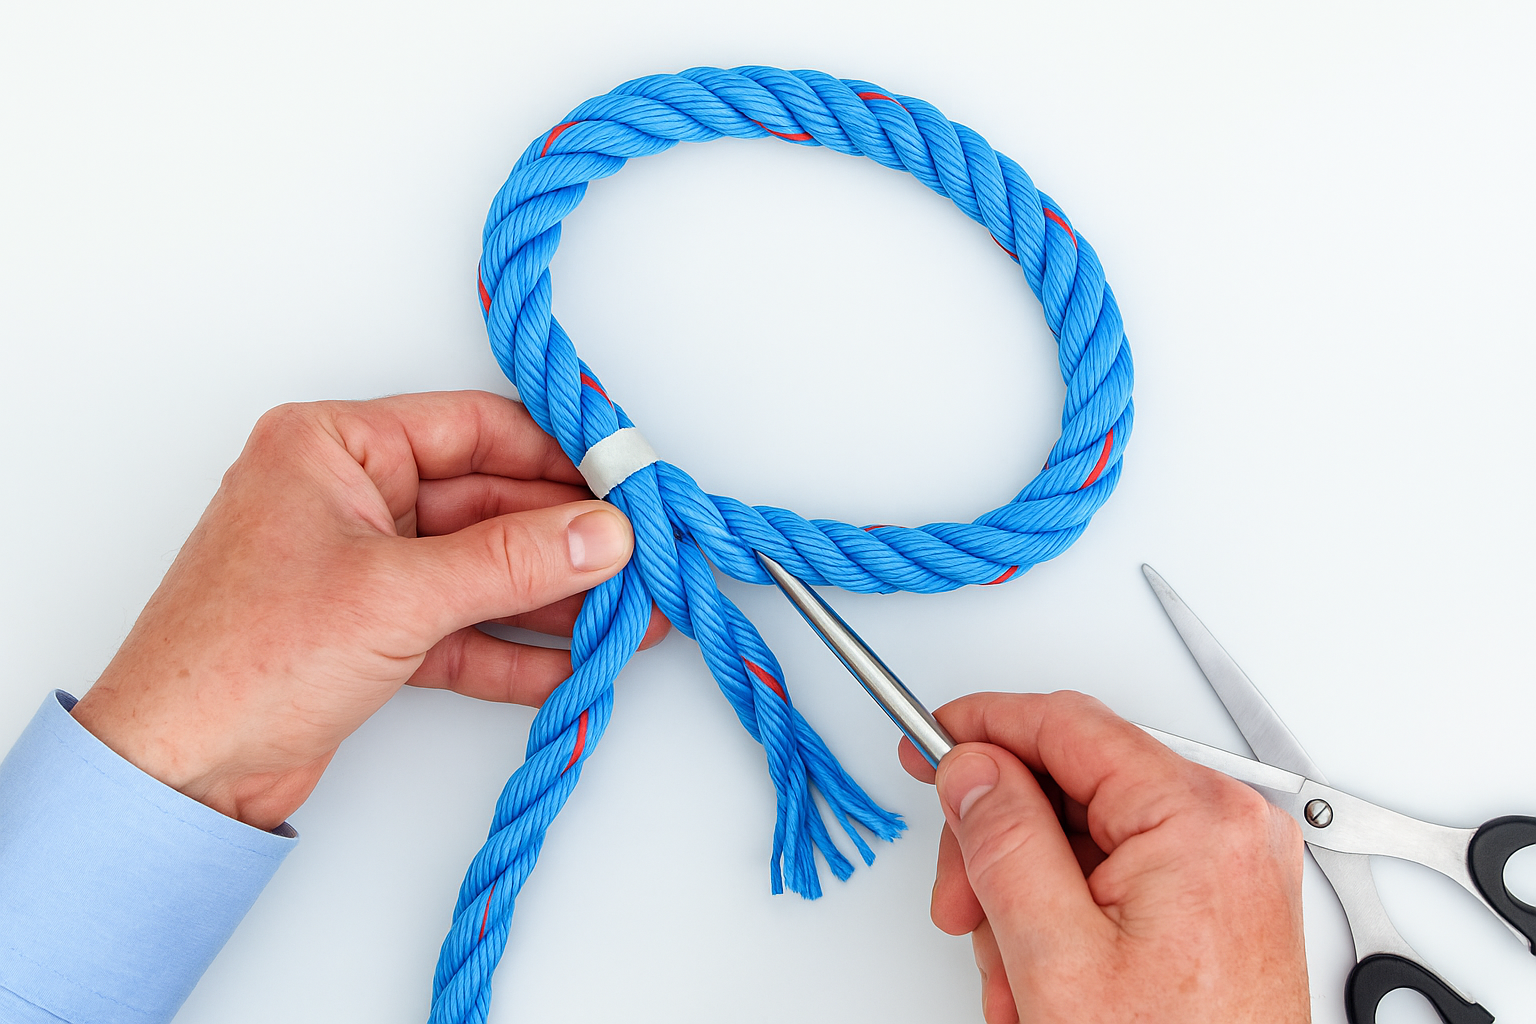
6. Trim the Loose Ends
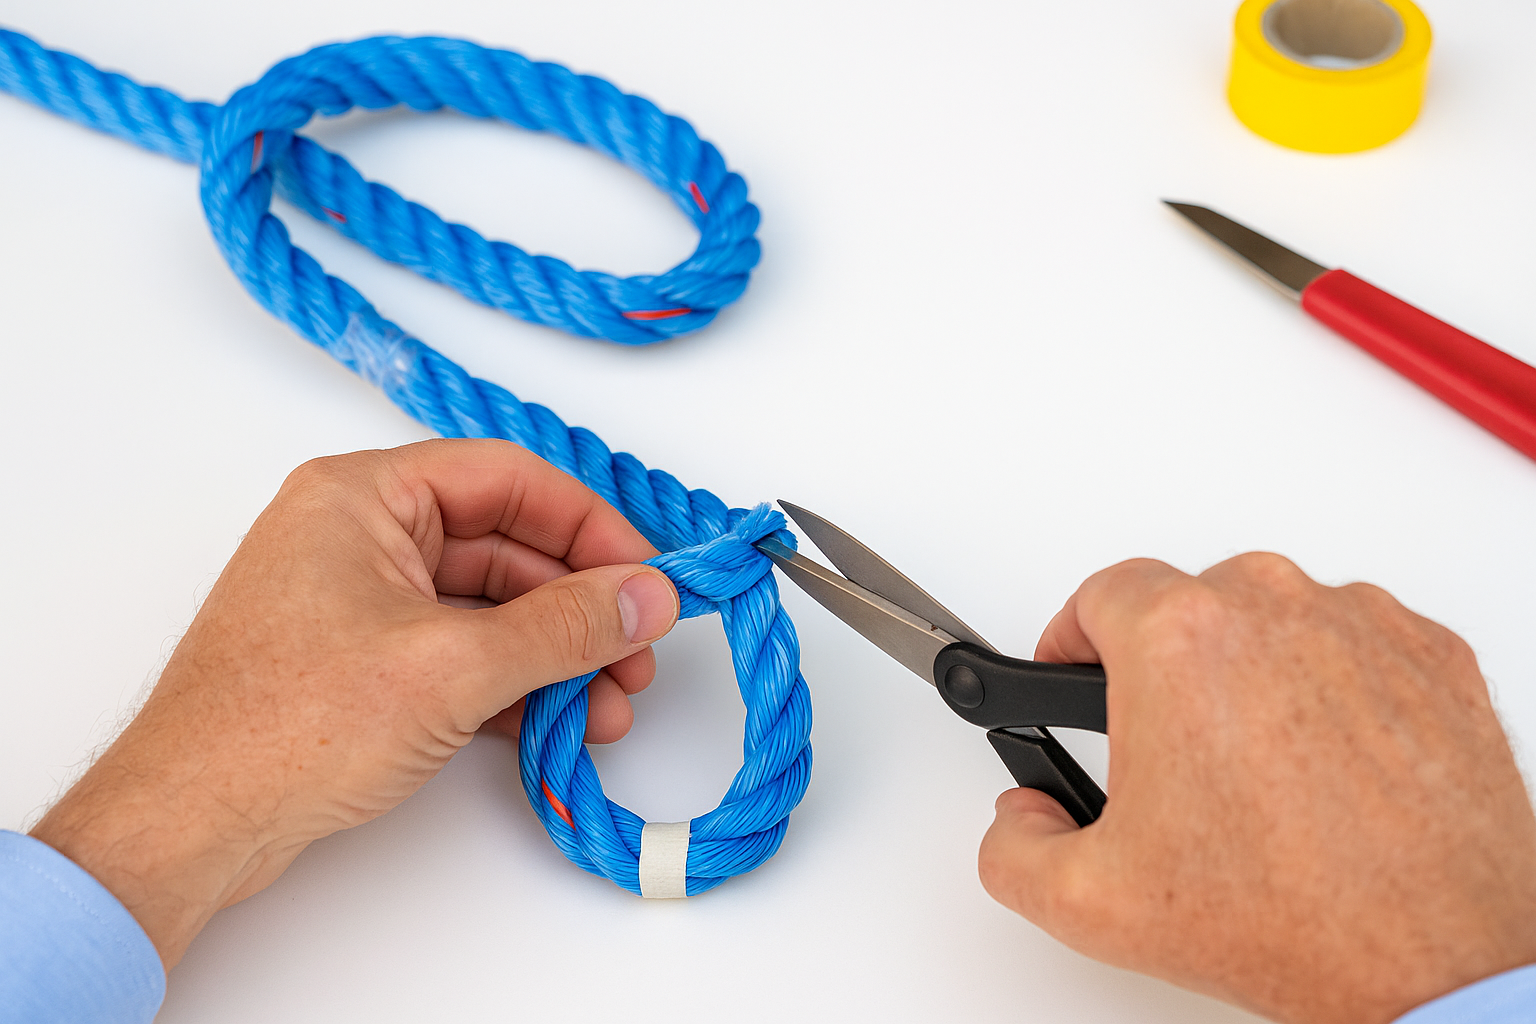
Use scissors or a sharp knife to cut off any extra strands sticking out after the tucks. Cut close to the rope, but avoid slicing into the braid itself. The cut ends should sit flush with the surface.
7. Wrap with Whipping Twine or Tape
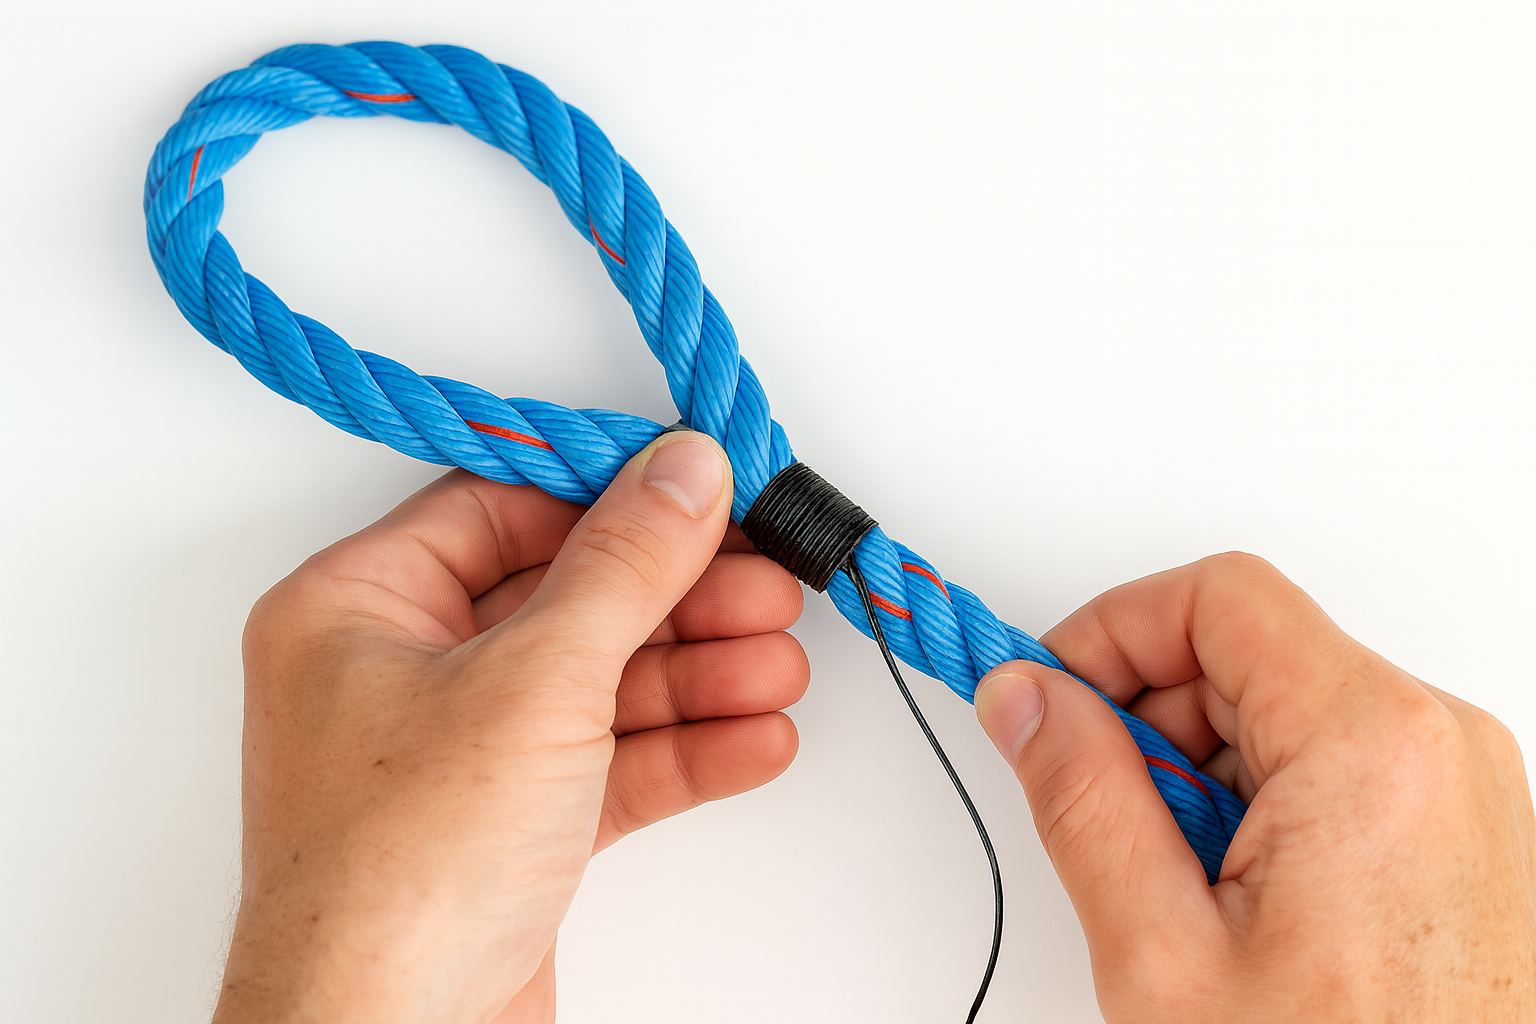
Wrap whipping twine or durable tape tightly around the base of the splice. This locks everything in place and helps the rope resist wear and fraying over time.
Learn to Splice on Board During Sailing Virgins’ Training
Eye splices outperform knots. They keep the rope intact under tension and hold their shape without slipping. Sailors use them to set halyards, secure mooring lines, and attach gear to the mast.
Sailing Virgins teaches rope splicing in advanced-level courses held aboard modern yachts.
You practice each splice under sail. Instructors guide you as you prepare lines, work with braided ropes, and apply new skills in real sailing conditions.
Sign up for a Sailing Virgins course and learn hands-on while exploring the world’s best sailing grounds!